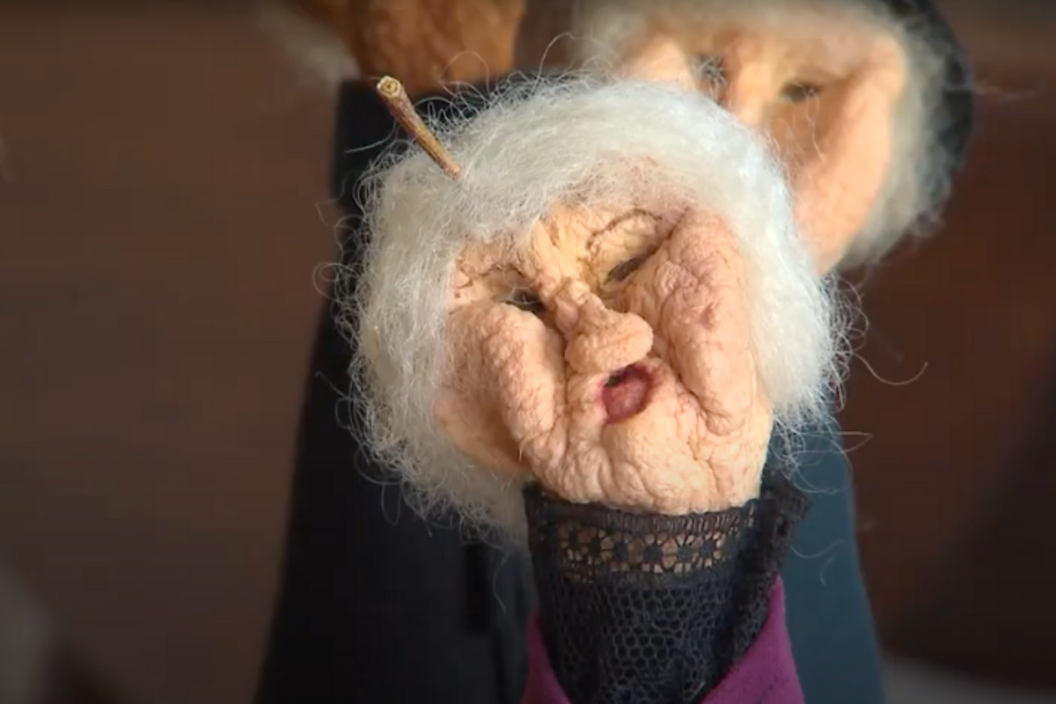
No matter how old you are, you or your sisters were probably given a doll at some point in your childhood. From Barbie Dolls to American Girl Dolls, these provide everything a child needs to fill an afternoon with imaginary games. Dolls have been a toy throughout all of history, but back in the day they had to use what supplies they could find to make them. One of the most unique dolls made in the old days were apple head dolls, which are as adorable as they are creepy.
Videos by Wide Open Country
The Origin of Apple Dolls
Making DIY applehead dolls dates back to prehistoric times, when puppets were used for magic displays and healers used dolls for medicinal rituals. Although this happened all over the world, dollmaking has its own history in the United States.
When the first early American settlers arrived, the Native Americans taught them how to make applehead dolls from the materials they had- corn husks, wood, lobster shells, twigs and nuts. The Seneca Native Americans were known to make dolls out of apples, which Appalachian communities then adopted. Making apple head dolls a tradition carried on over generations and is now considered an American folk art.
How to Make An Apple Doll
https://www.instagram.com/p/B34SZeBgcK4/
To make these strange little toys, you need an apple, a peeler, a sharp paring knife, a small bowl, lemon juice, salt, wire, varnish, coat hangers, pliers, rags, cotton balls, red acrylic paint and some scraps of cloth.
To start, you begin by peeling your apple. Then, whittle the apple in the shape of a head, doing your best to imitate the eyes, nose, mouth and ears. It's best to carve the facial features as evenly as possible, not going too deep or shallow when making the face.
At this point, depending on your carving abilities, the apple doll will look like a generic little head, but its true character will develop as it dries. Once you're satisfied with your little face, dip the apple into a bowl full of lemon juice for about a minutes. Then, sprinkle it with salt. These steps are the most important part of the drying process, as lemon juice and salt will keep it from rotting. Then, push two apple seeds into the carved eye sockets of your doll to make the eyes.
Once the doll's head is ready, push a length of wire or a large paper clip straight through the core. Bend the wire at the bottom to keep the apple form sliding off and make a hook at the top. Then, hang the apple in a window, but keep it out of direct sunlight.
Over two to four weeks, let your little apple doll head dry out. The face will slowly change as the apple dries and shrinks, and eventually there will be a distinct dried apple face with an expression and a personality.
Once the shrunken apple head is fully dry and about half its original size, it's ready to be taken down. Give it a coat of varnish for preservation, and now it's time to give your doll hair and doll's clothing.
Pull apart a cotton ball and glue it around the face for hair, or even give it a little bun. Since your doll will look like an adorable grandma or grandpa, the white hair will fit in well. Then, make the doll's body by using a pier to twist a coat hanger into a stick figure. For extra sturdiness, use double wire for the limbs.
To make your doll into a little person rather than a stick figure, wrap old rags or sheets around its arms, legs and body, securing with rubber bands or tape. Then, give your creation doll's clothing. You can either sew mini clothes from scraps or make do with little fabric patches tied or taped onto the body.
Once the doll has a body and a head, all you need to do is attach it. Skewer the head firmly onto the stick figure's neck. Then, make hands and shoes out of wood, dried apple, or more scraps. Last but not least, give your little doll some color on his or her cheeks by lightly brushing on red acrylic paint. Enjoy this relic of the past as a Halloween decoration or memento of an American folk art!


